

How To Edge A Garden With A Spade
How-To
Perfect Edges for Your Beds and Borders
Follow these four steps to keep lawns and beds looking neat

As an interior designer, I've always known the importance of well-defined lines. Inside the house or out, a clean, smooth line provides a finished look and a sense of clarity to an area. In my garden, a razor-sharp edge serves as a stage that sets off the careful planning and maintenance I do. Such meticulous attention to detail doesn't require a lot of work. I use four simple steps to create and freshen up my edges in spring, giving my beds the crisp lines that reflect the effort I put into my garden.
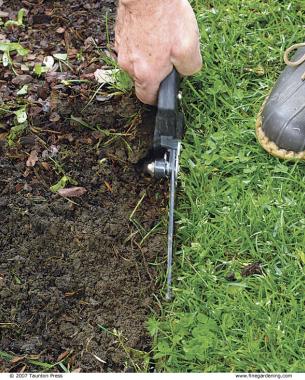
Step 1: Create (or re-create) an edge
The first step is to cut the edge. If you are creating a new bed, you'll need to use a garden hose to mark your desired lines. If you are freshening up an existing bed, you can jump right in.
Method 1: The traditional way to do this is to use either a spade or a half-moon edger to move along the line you've set out. Neither tool does a great job of cutting curves, and it can be difficult to evaluate the course you're taking as you move along.
Method 2: I use Black & Decker's Edge Hog, a tool with a circular blade on wheels. I simply walk behind the tool as it rolls easily along, cutting a continuous 1½-inch-deep line into the soil. The wheels give the tool the mobility to make nice curves, and you can clearly see as you cut, making it easy to evaluate and revise the line of your bed. The edger sells for under $100, and it simplifies the daunting task of caring for my four-acre garden, with its 5,000 linear feet of edging.
Step 2: Remove the turf
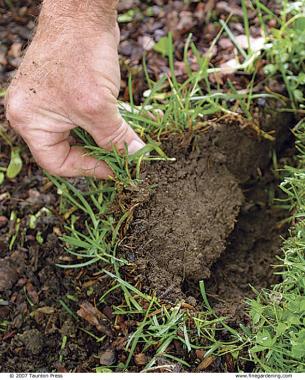
Once you've established your edge, refine it with a spade, deepening the cut to 4 to 6 inches. If you are cutting a new bed, you also need to cut the turf on the inside of the bed with the spade. The loosened turf can then be removed easily by hand. The goal is to create an edge at a 90-degree angle.
Step 3: Hone the edge
I like my edges to be razor sharp, so I place hand shears vertically along the trench wall and cut any remaining grass blades from the edge. Care should be taken not to hold the shears horizontally to avoid destroying the right angle of the edge. I repeat this step two or three times during the growing season to keep my edges looking groomed.
Step 4: Mulch the bed
The final step is to put down 2 to 3 inches of mulch on the bed. The mulch not only suppresses weeds but also adds a rich, dark color to the edge. I mulch right up to the edge of the turf to create a gentle slope from the bottom of the edge to the top of the bed.
More helpful information
Get our latest tips, how-to articles, and instructional videos sent to your inbox.
Related Articles
The Latest
Collection
Everything You Need to Know About Conifers
What is a conifer? We think of it as an evergreen plant with needle-like foliage, but a conifer is simply a plant that bears cones. And not all conifers are…

Webinar
Seed-Starting Tips and Techniques (Class)
Starting plants from seed opens a world of possibilities to gardeners of all skill levels. Many vegetables, annual flowers, and even perennial plants can be started from seed using a…


-

How-To
Giving Back Through Gardening: Part 2
Back in May, Fine Gardening committed to planning and planting a garden for Karen, an emergency department nurse. It was a small way to say thank you for the efforts…

How To Edge A Garden With A Spade
Source: https://www.finegardening.com/article/perfect-edges-for-your-beds-and-borders
Posted by: fishcanconse.blogspot.com
0 Response to "How To Edge A Garden With A Spade"
Post a Comment